Monday, September 22, 2014

Mood Boards for MB Project

Hi all! I just wanted to share with you a few mood boards I made up for a client recently. I am super excited about this project! I will post the actual pictures of the house once it is completed. :)


Tuesday, July 22, 2014

Skinny Farmhouse Table

So a friend of mine just moved into an adorable little house and asked me to help her design a farmhouse table for her new dining room. The dining room is long and narrow so we decided to do a traditional farmhouse table and just make it skinnier! 


I think it fits great in the space! Here are a few shots of the table in my messy garage before it made its way over to her house ;) 


On the top of this one I used Minwax Classic Gray and then put Minwax Early American on top. After that I did a light sanding to lighten it up a bit. Love the way it turned out! 


WOW I NEED TO SWEEP.


Turned Leg Coffee Table

Hey guys! Im excited to show you the coffee table I recently finished. This one was actually for MY house! YAY! I got the plans from Ana White - so simple and easy to understand! A pretty cool fact to point out is THE Ana White worked with MY awesome neighbor Jen from The House of Wood to make these plans available! Also I got the legs from Osborne Wood Products and at only $28 a piece (for Pine) Id say you can't beat it.


Here is a "during" photo haha. I am NOT good at documenting the step by step process obviously. But I could not have built this without my amazing Kreg Jig!!! Check them out!!!  ^_^

Here is a little close-up of the color - I used Minwax Classic Gray for this one! I had planned to layer it with some other color, but I like this so much I decided to leave it. :) 


Thanks for stopping by!


Monday, July 14, 2014

Kate Spade Kerryn Tote Review

Kate Spade Kerryn Tote in Pink


I scored this beauty at TJ Maxx a few weeks ago. I saw it, tried not to run too quickly, snatched it up, and haven’t let it go since. ^_^ I absolutely love the color of this tote. It is a gorgeous bright pink! Perfect for spring and summer. (Ok let’s be honest….this color is perfect anytime of year!) The inside lining is black with white polka dots. Shut Up. It couldn’t possibly get any cuter than that! It has a large zipper pocked on the inside as well as two smaller pockets for a phone, etc.


This bag is absolutely the perfect size. It fits my macbook with plenty of room to spare. There is a small button at the top of the bag to keep it shut, which I really like. I Highly recommend this bag! J


Kate Spade Cobble Hill Ellen Review

Kate Spade Cobble Hill Ellen Crossbody Bag

I got this bag because I was needing (…wanting…same thing? :p) a new cross body bag. Sometimes a girl just needs an easy hands free bag! I was immediately smitten by the gorgeous color of this one, I think its called Grace Blue.


I have often wondered if it’s possible to fall in love with leather. I am now pretty sure it’s a legit possibility. ^_^ This bag, by far, is my absolute favorite of the bags I own. The leather is incredible! It is SO very soft. It looks and feels like a very high quality bag, which is what I’ve come to expect from Kate Spade! The 14K gold logo is gorgeous as well as the classic gold chains on the strap. The inside of the lining is a beautiful gold and cream stripe that coordinates perfectly with the soft blue on the outside of the bag.


It is also larger than a lot of cross body bags I’ve owned before. It can easily fit a small wallet, zipper pouch, phone, sunglasses, etc.


This bag – 10+ stars. Its amazing and I’m in love. J


Monday, June 23, 2014

Barstool Makeover

A friend of mine asked me to giver her barstools a face lift. ^_^ These are the barstools before...

And here they are after! After bouncing around several different ideas, we finally settled on a distressed chevron pattern to match the rest of her kitchen decor. I searched around for a good chevron tutorial because lemme tell you - that chevron can be tricky! I stumbled upon this awesome tutorial over at Mommy is CooCoo blog! It was so easy to understand and very helpful. It still took me most of the afternoon to get them just right but I think they turned out great! :) 

Tuesday, June 10, 2014

Swap-n-Shop Table

So a few weeks ago I found this table for sale on my local swap and shop. (if you don't know what that is, you should!) I jumped on it right away and even got delivery for an extra $5. Oh yeah. ^_^ 


 A little bit of distressing and some Annie Sloan Pure White later....


My DIY Home Office

In desperate need of a home office for my hubby and I, I decided to hit up Pinterest for ideas! (surprise!) I was really drawn to the diy file cabinet desks so I decided to go with it. I found this white file cabinet on clearance at a Ballard Design outlet (yay!) so I snatched it up. The legs came from IKEA - only $10 each! The chairs from Garden Ridge. aka Heaven. I Grabbed a few more supplies from Lowe's and voila! Hope you like :) Maybe it will inspire some inspiration for your own home office!


Saturday, April 26, 2014

Kids Table & Chairs

I got a request for a kids play table and chairs. I was so excited because I had been wanting to try this project for a while. I decided to use the Clara table plans from the amazing Ana White! The only thing I changed were the legs - my friend wanted the legs slightly at an angle. Other than that I followed her plans and they worked out perfectly! I love how simple her plans are - building for dummies here ^_^

I thought it would be fun to do a gold dipped look on the legs of the chairs and table. Ta-dah!

Farmhouse Table

So I got a request from a friend of mine who wanted a farmhouse table for her dining room! We browsed Pinterest together pinning photos of tables she liked the best. She decided on a classic farmhouse table with simple 4x4 legs. She opted for the breadboards on the end of the planked table top. Here it is being put together - first I built the apron then attached it to the table top boards.

Next came the breadboards...and a whole ton of sanding haha. 


She wanted creamy white legs with a tiny bit of distressing. *Ignore my messy shop please...I plan to clean it soon...really.* ;)

Ikea Rast Hack Copy Cat

Hello everyone! My mother-in-law has been in search of nightstands for quite some time and wasn't having much luck finding something she loved. She asked me to help and I immediately hit up Pinterest for some inspiration! I stumbled onto a few Ikea hacks and fell in love with the Ikea Rast dresser hack from 
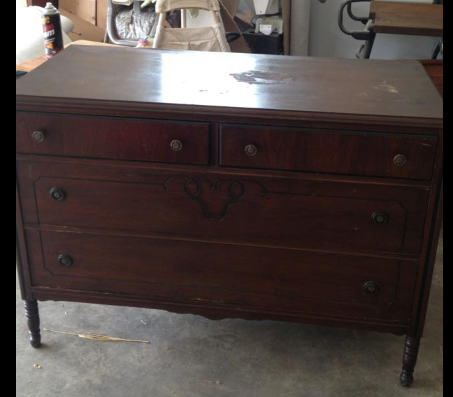
TheTurquoiseHome. If only I were as creative as that! My blog should be titled big fat copycat... *wink* Now Ikea is just under 3 hours away from me...sigh. But thankfully I was already planning a trip that weekend so it worked out perfectly. Here are the dressers before...well sort of. As usual I got ahead of myself and started working before I took a before picture haha...


Materals I used:

Lattice  - 9 pieces at 8ft 
Wood glue
8 ft of baseboard
2 - 1x4x8 for planked top
1 - 1x3x6 for planked top
(or any combination of scrap wood you may have laying around)
Paint, stain, etc.

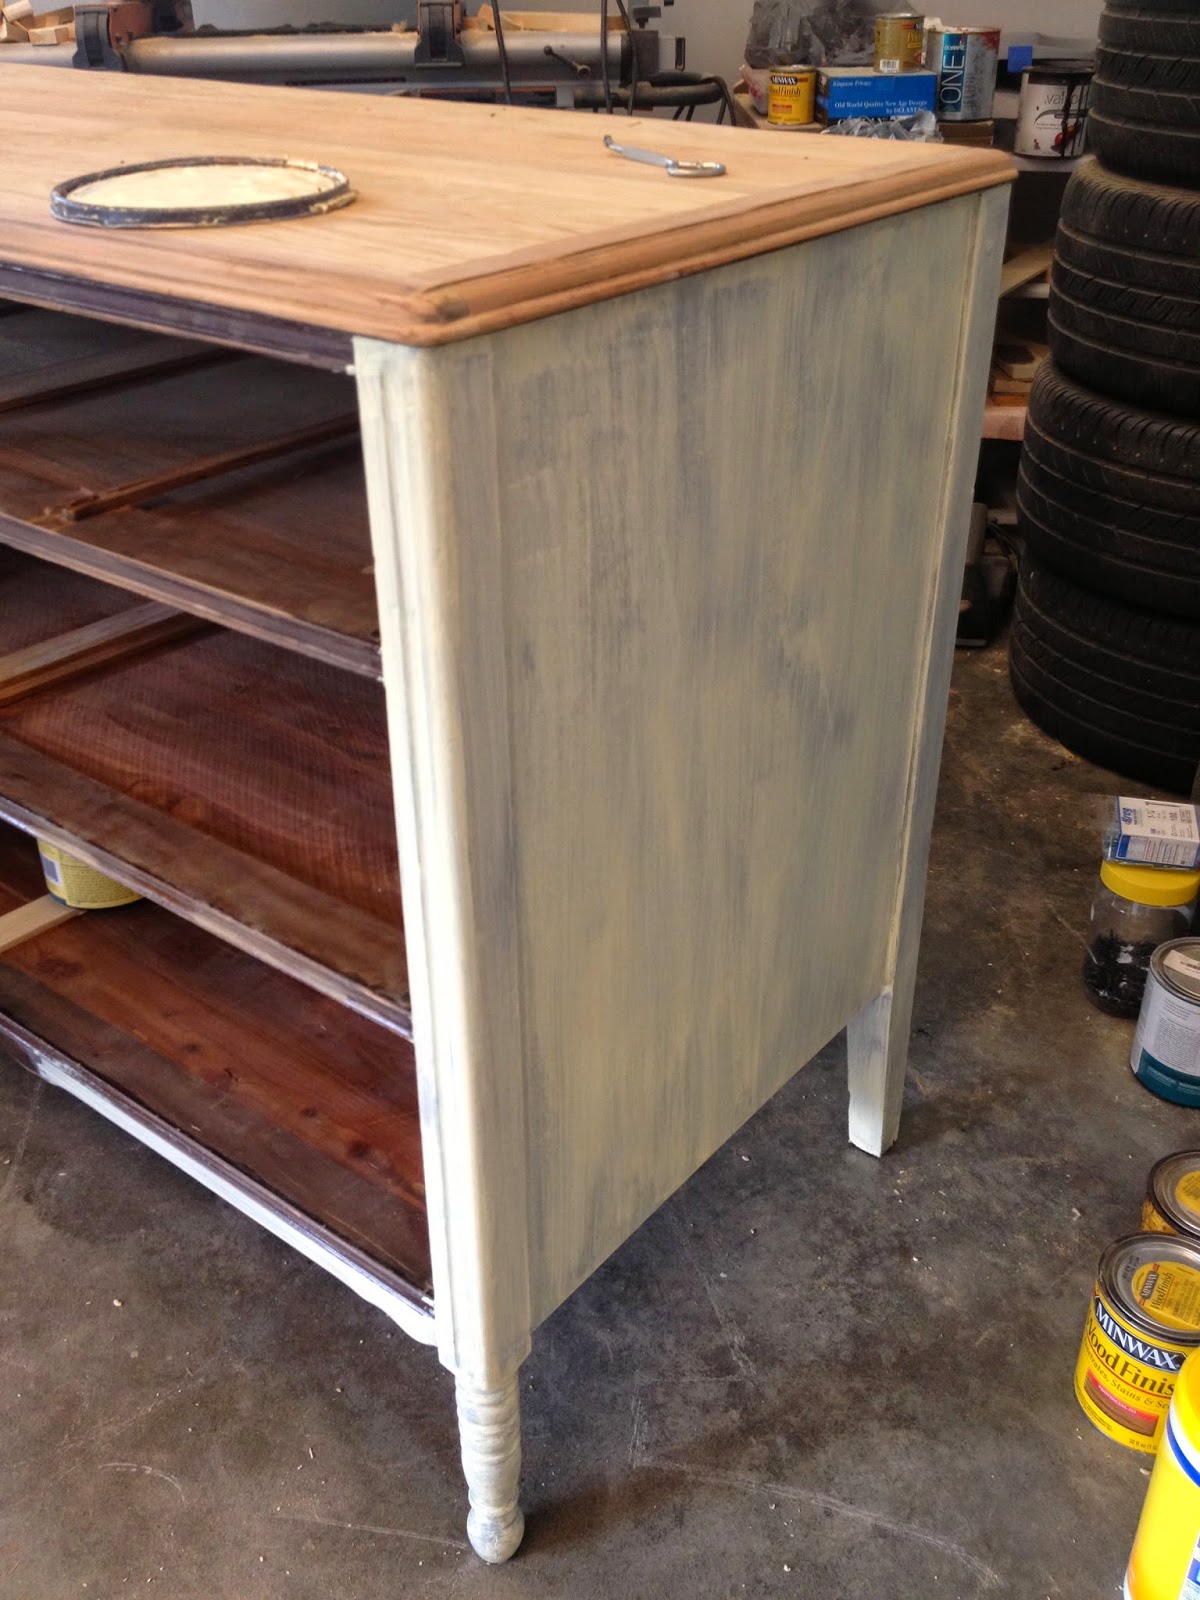
I am not the best at taking in-between pictures but I did manage to snag one!


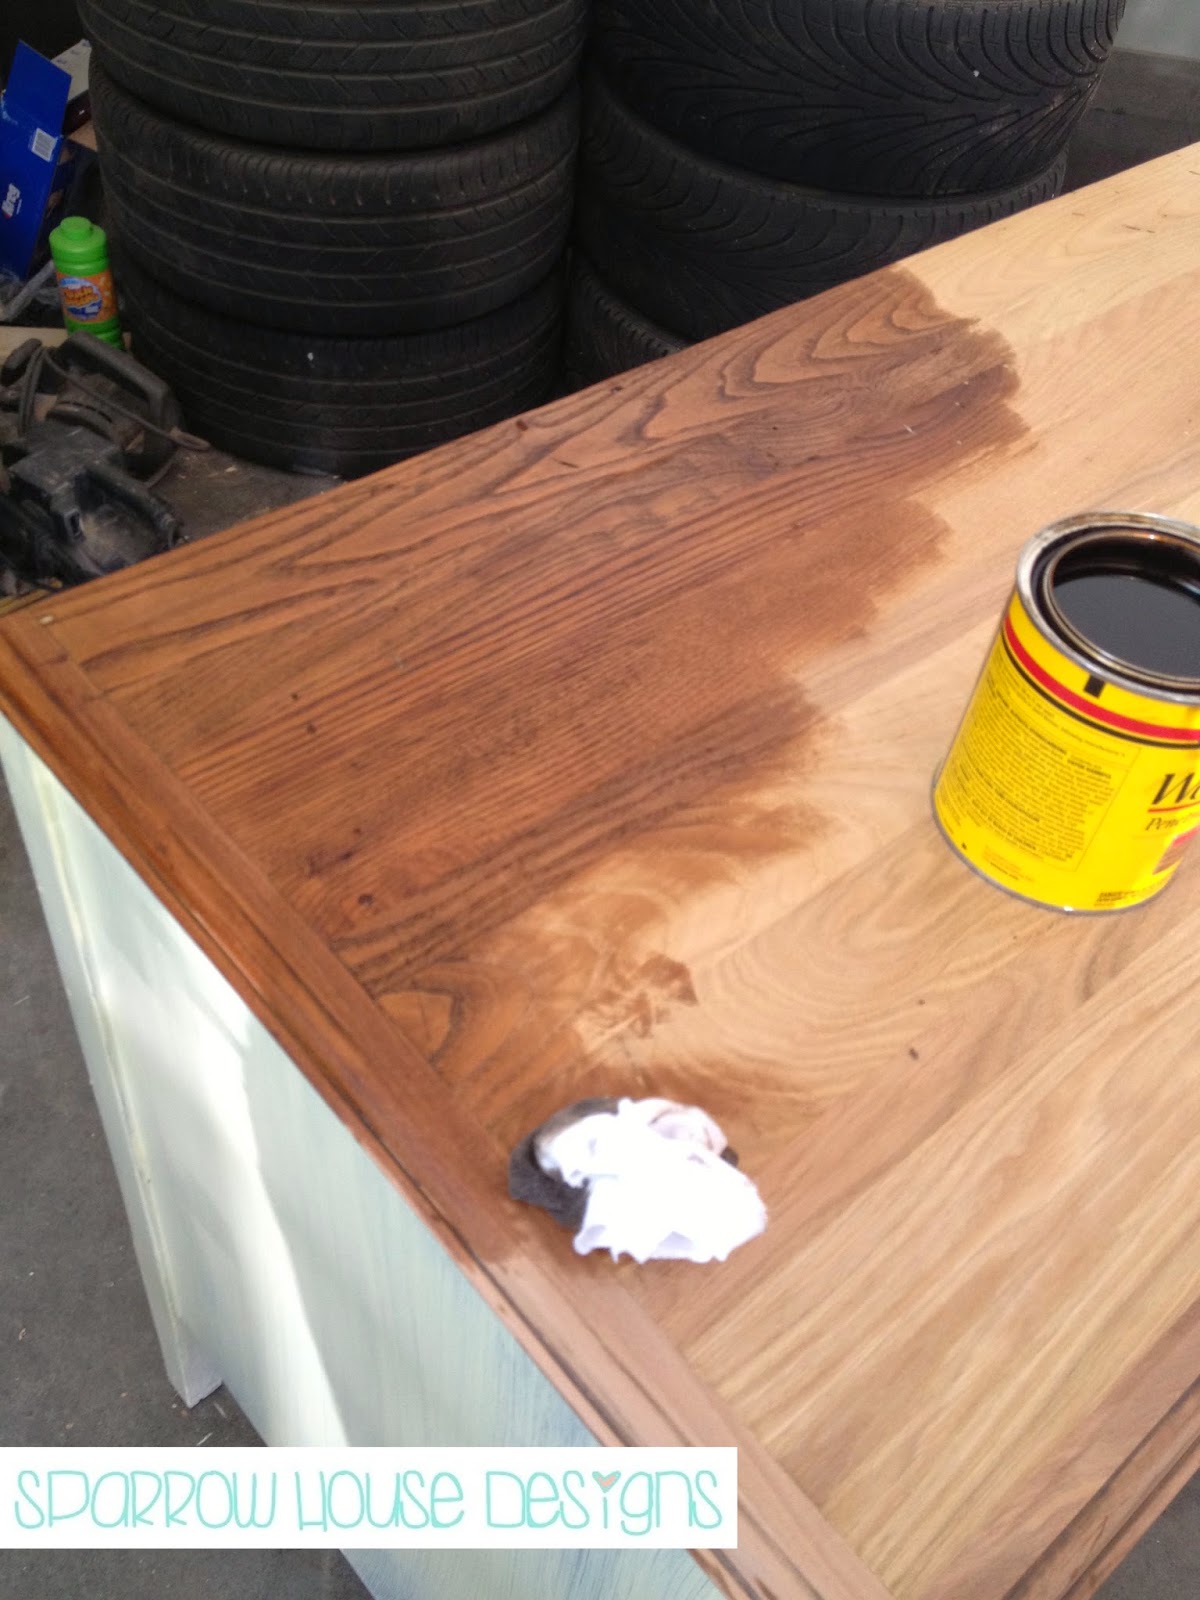
After this came several coats of paint, some glazing, and polycrylic to seal and protect. Since i needed 6 knobs for each nightstand I knew it could get pricey! Enter Ebay. 99 cent knobs plus free shipping. ^_^ 

And here is the finished product!


Now my mother-in-law needs matching bedside lamps to make it complete :) 


Monday, April 14, 2014

Lucy Dresser

I had been on the hunt for a small chest to use in my entry way for a while! I had this empty wall that was really needing some love. :) I have this slight addiction to browsing craigslist on a daily basis, but sometimes it pays off! I scored this beauty for $60! It did take me over half an hour on good ol' Kentucky backroads to find the place....but still. I was a happy girl!


I had some leftover paint I had used in my office and decided to use it up. Sherwin Williams - Valspar vanilla bean! Its such a soft yellow... I just love it.


I wish I had taken pictures while taking the THREE layers of veneer off the top of this dresser....can you say nightmare? I finally stole my husbands hand planer and that seemed to do the trick. Here it is with a stripped top and one coat of paint. I stained the top with Minwax Special Walnut ( I think...hehe) and distressed the dresser for an antique look. I sealed the top with Johnson's Paste Wax. I have since discovered Annie Sloan's wax....I don't think I'll ever use paste wax again!!!


Ta-dah!


BLOG DESIGN BY DESIGNER BLOGS